Real-Time Face Detection using OpenCV

Previous parts: [Part 0], [Part 1]
In this post we will go through the process of detection and tracking faces in video frames using OpenCV and Deep Neural Network, all in real time. In the [previous part(https://vladkol.com/posts/gstreamer/) we learned how to get frames from an IP or USB-connected camera using GStreamer. Now it’s time to detect faces so later we can perform face identification. At this point we just need to know if there is a face on the frame image, and where that face is, or as they say, face bounding box. Along with face bounding box, we will get so called facial landmarks - specific points on face, such as eyes, nose, mouth corners and more.
![]()
The tracking is important because we need minimize number of expensive identification operations for the same face. If a face is just moving around, we should be able to track it and only send new faces for identification. The animation above shows how it preserves tracking number (1) between frames.
A very brief history of Object (and Face) Detection
Before Deep Learning: Viola-Jones Haar Cascades and Histogram of Oriented Gradients
Efficient object detection algorithms are not very old. They only became possible when Machine Learning emerged from theoretical researches and prototypes to real-world implementations, along with progressed hardware performance, in early 2000s.
You probably heard about a method based on Haar Cascades that was proposed by Paul Viola and Michael Jones in their paper “Rapid Object Detection using a Boosted Cascade of Simple Features” in 2001. It is a machine learning algorithm based on AdaBoost approach. Cascade classifier and Haar Cascades in particular were not made specifically for faces, but became increasingly popular due to their efficiency (at that point of time), and OpenCV made it easy to use by not only providing an implementation, but also a pre-trained classifier. Haar classifier and its features are similar to those in Convolutional neural networks (CNN) (I’m a bit oversimplifying here) with one big difference - in CNN, the network learns which features to use during its training, while Haar features and hand-picked.
Here is a brief explanation of how Haar Cascade Classifiers work.
Another popular and somewhat even better method is “Histogram of Oriented Gradients”. Robert K. McConnell invented it back in 1986, but the algorithm only became popular after Navneet Dalal and Bill Triggs presented their HOG work in 2005 at Conference on Computer Vision and Pattern Recognition (CVPR).
With HOG detectors, instead of using hand-picked features, they use histograms of pixel gradients calculated on a sub-images. Satya Mallick put a detailed article on HOG.
Non-Maximum Suppression (NSM)
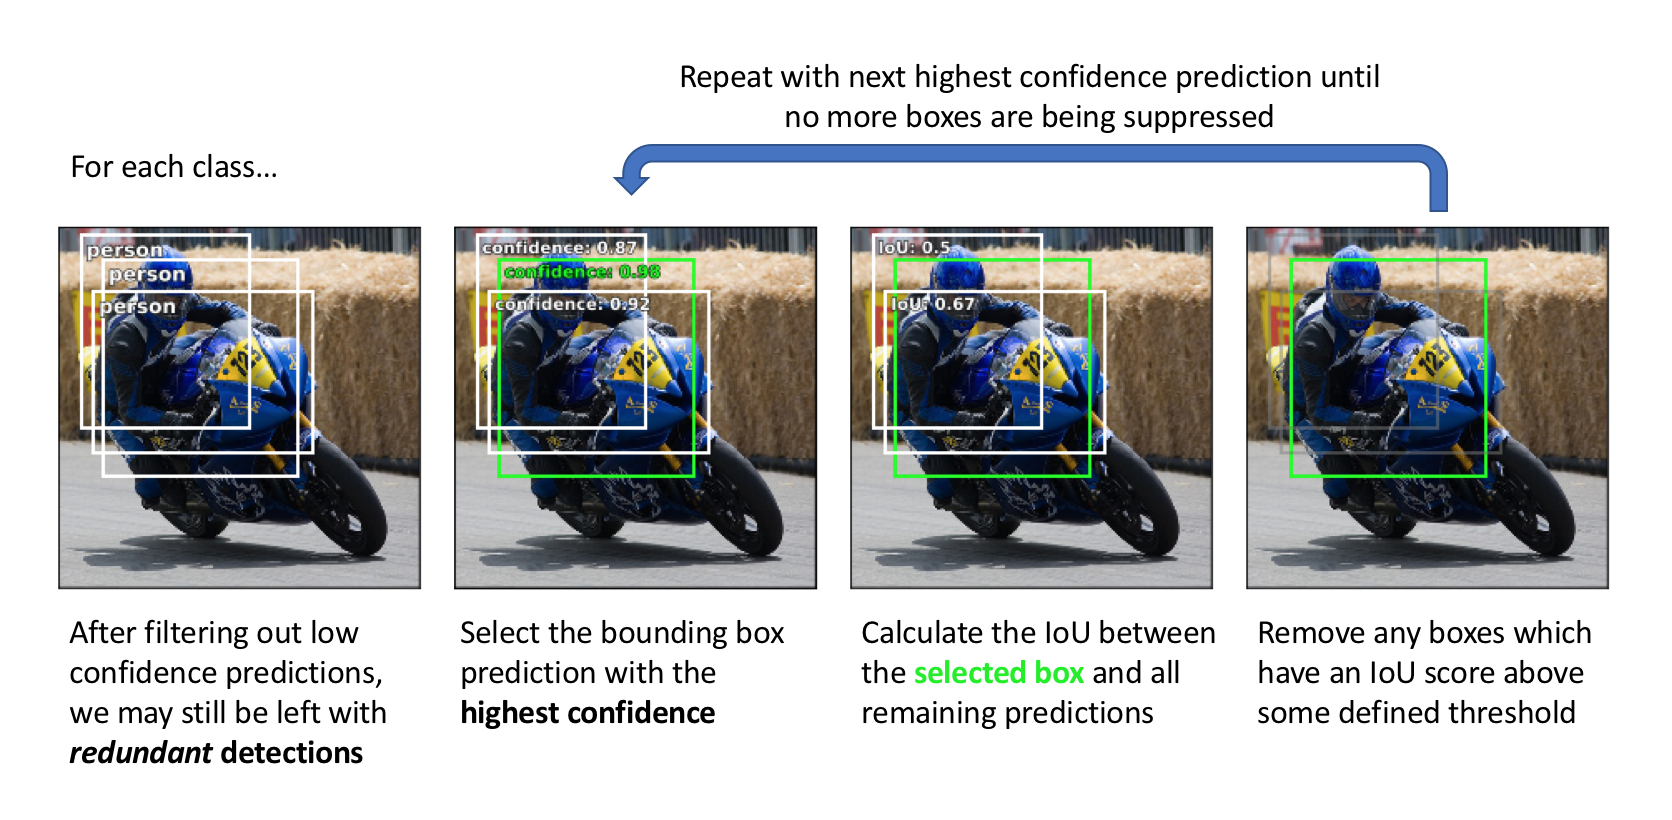
No matter which detection method you use, initially you end up with a lot of bounding boxes for the same detected objects. Non-Maximum Suppression algorithm helps with choosing a bounding box from a group of candidates for the same object. This algorithm groups overlapping bounding boxes starting with those with high-confidence and applying Intersection-over-Union (IoU aka “Jaccard Index”) on others, for each object object type separately. Look at how Jeremy Jordan illustrated it:

Deep Learning
Since 2001, there was a lot if advancements in object detection, Convolutional Neural Networks and Deep Learning (what’s the difference?). It was primarily due to increasing hardware power available for training networks.
With ImageNet dataset and AlexNet convolutional neural network in 2012, a new era of Computer Vision started. Popularity of CNN-based methods exploded, starting from those based on sliding windows.
Soon after that, in 2013, Ross Girshick came with R-CNN architecture. It was a huge advancement followed by improved versions: Fast R-CNN and Faster R-CNN.
R-CNN and similar algorithms, instead of practically brute-forced approach, use different methods of selecting Regions of Interest (RoI), so there is less classification iterations needed.
These are multi-stage algorithms. First, they extract region proposals. Then, on every proposal they compute CNN features and classify it.
Single-stage methods
In 2015, Joseph Redmon at al. introduced a novel approach to object detection: “You Only Look Once: Unified, Real-Time Object Detection” or YOLO.
A few months later, Wei Liu at al. revealed “SSD: Single Shot MultiBox Detector”.
Both these methods use direct object prediction without intermediate stages used by cascade classifiers, HOG-based algorithms and different versions of R-CNN.
Jeremy Jordan has an excellent overview of single-shot methods which I recommend you to read.
Both algorithms use 2 interesting concepts:
- Backbone Network - pre-trained as an image classifier to more cheaply learn how to extract features from an image.
- Prior boxes or anchors - a collection of bounding boxes with varying aspect ratios which embed some prior information about the shape of objects we’re expecting to detect.

And guess what - they still leverage Non-Maximum Suppression to generate final bounding boxes!
Here is some further reading on different object detection methods by Jonathan Hui:
- What do we learn from region based object detectors (Faster R-CNN, R-FCN, FPN)?
- What do we learn from single shot object detectors (SSD, YOLOv3), FPN & Focal loss (RetinaNet)?
- Design choices, lessons learned and trends for object detections
Signle-shot Anchor-free Models
Deep Learning for Face Detection
WIDER FACE dataset played a huge role in taking face detection where it is today. Deep Learning methods of Face Detection practically achieved parity with human brain. Just to name a few:
- RetinaFace: Single-stage Dense Face Localization in the Wild
- DSFD: Dual Shot Face Detector
- PyramidBox: A Context-assisted Single Shot Face Detector
- Joint Face Detection and Alignment using Multi-task Cascaded Convolutional Networks aka “MTCNN”
These are powerful methods, all pretty fast, especially RetinaFace which is the most developed method in terms of different variations.
However, all implementations I’m aware of are still relatively slow for using on a device like Raspberry Pi 4 with simultaneous video decoding.
Fortunately, there is a group methods optimized for using on mobile and Edge devices:
- RetinaFace on MobileNet-0.25, a RetinaFace variation on top of MobileNet as the backbone network.
- Ultra Light Fast Generic Face Detector, super-fast and popular (almost 5K stars on GitHub), although doesn’t have landmark detection.
- A Light and Fast Face Detector for Edge Devices, an anchor-free method designed to be used on Edge devices.
- Face Detector 1MB with landmark, which is actually a family of different networks including an alternative implementation of RetinaFace on MobileNet-0.25.
- Libfacedetection, a super-popular (>9.5K stars on GitHub!) pure C++ implementation of a high-performance face detection method based on FaceBoxes and original SSD.
- BlazeFace, a very fast model made by Google, again on top of SSD (here is the paper). They distribute the model it in Tensorflow Lite format as a part of MediaPipe framework. There are versions converted to “big” Tensorflow and PyTorch. Google didn’t release training code, although there is an alternative implementation which you can train (notice they have one for FaceBoxes as well). BlazeFace has 6 landmarks, different from what the majority of models expose - 2 eyes, 2 ears, nose and the middle of mouth.
Trying all these great masterpieces, I had 4 requirements in mind:
- Running real-time face detection on Raspberry Pi 4 CPU with video decoding at the same time.
- Detecting at least 5 landmarks (2 eyes, 2 moth corners and nose).
- Ability to run inference using OpenCV DNN module.
I ended up with 3 “favorites”:
- “Slim” version of Face Detector 1MB with landmark, #4 in the list above, converted to ONNX.
- Libfacedetection, #5 from the list above, converted to ONNX from the original PyTorch version.
- BlazeFace converted to ONNX from its PyTorch version by Matthijs Hollemans converted from the original TensorflowLite model.
It’s also important to have in mind that there is no need to use a super-duper precise algorithm. What I need is a lightweight method that can detect a face in roughly 7-10 feet (up to 3 meters) from the camera, so we can evaluate the pose by detected landmarks and send a cropped face for identification.
After analyzing models from the short-list, I decided that BlazeFace has a good balance of quality, performance and ready-to-use state.
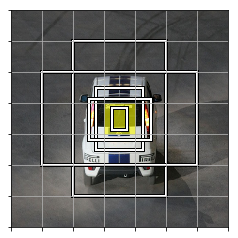
Google’s BlazeFace is extremely optimized, designed and trained for mobile cameras and faces in short distance (input resolution is just 128x128 pixels). It doesn’t have the best quality, but look at their web demo! The speed matters. There are 3 reasons why I go with it as my primary face detection model:
- It is heavily optimized and very small which is good for scenarios with embedded devices.
- Despite its focus at mobile cameras and short distance from the camera, the model works pretty well for its purpose in our scenario.
- Google conveniently provides a pre-trained model for free use with no strings attached. Yes, Google only does it TensorFlow lite format, and lately, only quantized. Therefore, we use not the most recent version. Thankfully, there are alternative implementations with good results, so in case if we need to train our own version, we can totally do that.
Another good news is that we are going to use BlazeFace later for building our Face Enrollment App for collecting different face images so Azure Face API can use them with its Identification model. Face Enrollment App will be a web app because it help people enroll on any device (even on iOS if you use Safari!). So the web version of BlazeFace will be a great helper there. And we can leverage FaceMesh as well!
Get to code
Simple Face Tracking
This series is still just a peak to what it takes to run a production-ready biometric security solution. Before you make it a real production solution, there is way more problems to solve on device management, anti-spoofing, resiliency, DevOps, security and privacy.
It is solely a personal project, based on my personal learnings and experiments, with no guarantee or intent to be used for protecting anything that is important to you. I will not be liable for damages or losses arising from your use or inability to use any code or practices described here or on linked resources.
Getting started on the device
“How about some code?” you may ask 😃 Here we go!
We start at #1 from the list above:
- Capturing video using GStreamer
- Performing Face Detection (a big one!) using a couple of different methods
- Adding Face Tracking to avoid duplicating requests for the same face
- Training our own face detection model
First stop - Part 1: Capturing video using GStreamer
Page header photo is made on photos.icons8.com