Part 1 - Video capture using GStreamer and gstreamer-netcore

Previous parts: [Part 0]
Video capture is the very first step in any video processing system, so it’s going to be our first task as well. As I mentioned in Part 0, we will be using an RTSP-capable IP camera as our video source. Ideally, for development purposes, it would be great to be able to capture video for a USB-connected web camera as well. Even better if we could do that with the same code.
Sounds too good? Yes, and it is absolutely achievable - with GStreamer.
What is GStreamer
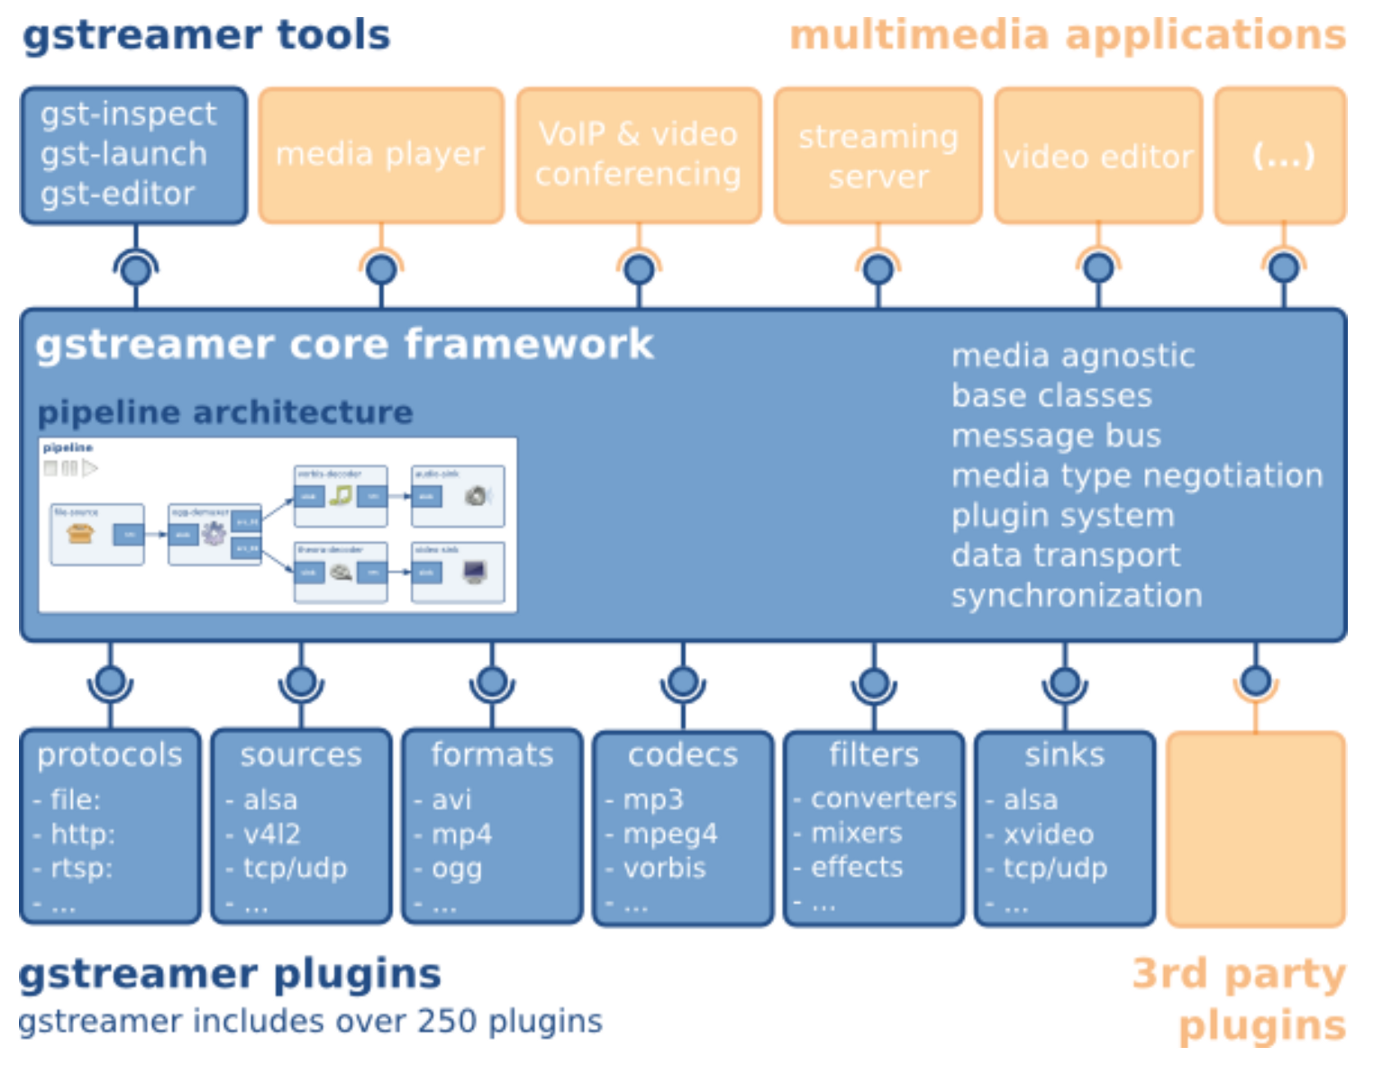
GStreamer is a library for constructing graphs of media-handling components. The applications it supports range from simple audio/video playback and streaming to complex audio mixing and non-linear video editing and processing. GStreamer works on all major operating systems such as Linux, Android, Windows, Max OS X, iOS, as well as most BSDs, commercial Unixes, Solaris, and Symbian. It has been ported to a wide range of operating systems, processors and compilers. It runs on all major hardware architectures including x86, ARM, MIPS, SPARC and PowerPC, on 32-bit as well as 64-bit, and little endian or big endian.
GStreamer is widely used in many real-time media processing pipelines, including Video Analytics solutions from major vendors. They often make 1st-party components (plugins) directly embeddable into GStreamer pipeline graphs. There are also plugins made specifically for solving Computer Vision problems using OpenCV underneath.
GStreamer is a powerful tool for building media processing solutions. I strongly recommend learning it in details. One of the GStreamer’s greatest features is an ability to create media pipelines entirely in command line. Of course, as it’s also a well-documented C library, the classic way of using it in apps is also available.

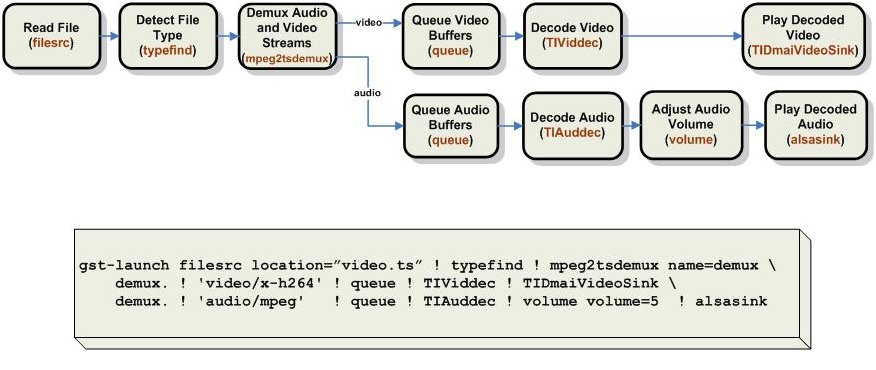
This page has a plenty of examples of how you can build different GStreamer pipelines using command line with gst-launch-1.0 - the ultimate pipeline builder app shipping with GStreamer.

We will use GStreamer in our own, controlling many aspects of the pipeline, but still using a command-line-alike approach. It is actually another great feature of GStreamer. You can build a pipeline graph by connecting elements one by one or start with parsing a “command line”, and then access elements by their names or traversing the pipeline graph.
Before we code
Installing GStreamer is different depending on what OS you do that. On Linux, I’d do that with whatever package manager is recommended on that distro. On macOS, I’d use Homebrew - it’s the easiest way to get GStreamer, plugins and all dependencies. On Windows, you have to use MiniGW (not MSVC) build because this is the only build .NET wrapper is currently compatible with on Windows.
Component-wise, in addition to GStreamer itself, also install “base” and “good” plugins (here you can learn what it means).
Depending on your OS, their names may be “gst-plugins-base” and “gst-plugins-good” (on macOS with Homebrew), or “gstreamer1.0-plugins-base” and “gstreamer1.0-plugins-good” (on Ubuntu and Debian), or “gstreamer1-plugins-base-tools”, “gstreamer1-plugins-base-devel”, “gstreamer1-plugins-good” and “gstreamer1-plugins-good-extras” on Fedora.
On Windows, with .msi installer, keep all default components selected, and add “Gstreamer 1.0 libav wrapper”.
Before you continue, make sure the following command results in video playback. You may replace the url with a video of your choice or a local file using a file:/// URL.
|
|
Simple app with GStreamer and .NET Core
Time to write some code. I use .NET Core with C# in Visual Studio Code. In order to make it possible with GStreamer and .NET Core, I made gstreamer-netcore package which hopefully at some point will make to the the official gstreamer-sharp repo.
First, let’s start from a simple sample app.
|
|
Open Program.cs and replace it with
|
|
As you may see, this piece of code simply plays video with audio (even with some UI!), waiting until the end of the stream. Replace uri with your rtsp:// camera address (may need credentials as well), and you will see camera’s video stream.
Getting raw video samples
Going forward, we need a bit more complex pipeline where we can intercept and analyze raw video frames. RawSamples example shows how to do that with an AppSink. And by the way, it also demonstrates how to create a pipeline by adding elements one by one instead of declaratively creating one using Parse.Launch.
|
|
Further, in NewVideoSample method we receive raw video samples, and you can see how to get actual raw buffers there.
Advanced processing pipeline
In order to achieve greater performance and simplify usage of AppSink with IP (RTSP) and web cameras, I created a few helper classes and put them to our first code sample:
https://github.com/there-was-a-face/1-GStreamer-video.
There is a few key points in that sample:
- GstVideoStream class builds a pipeline for you and handles GStreamer-specific actions and events. It supports web cameras, URL-based streams (including rtsp://) or any arbitrary pipeline declarations as you were using gst-launch-1.0 with a single mandatory appsink element at the end.
- GstVideoStream used declarative pipeline syntax.
- Instead of waiting for samples in AppSink.NewSample, it’s pulling samples on timer - this approach turns to be faster.
Please go ahead and take a look at the sample.
A lot of work is done for you in GstVideoStream class. It basically abstracts GStreamer internals and helps you focus on the actual analytics part.
OnNewFrame method in Program.cs is where the majority of video analytics work will happen going forward.
If we take the original example above, our new code would look like this:
|
|
What’s next?
Now we are ready for our first big CV task - detecting faces! I will do a few iterations on that, trying several methods, moving to an advanced DNN-based model, and optimizing the process with face tracking between frames!
![]()
Stay tuned!